This didn’t start as a DIY project.
It started as a cultural misunderstanding about floors.
I was born and raised in Korea, where daily life belongs to the floor.
You sit on the floor. You live on the floor. You eat near the floor.
Because of that, carpet has always felt a little… mentally unacceptable to me.
In a Korean home, the couch isn’t really where life happens.
It’s just a place you lean against, usually in front of a low table.
The dining table set isn’t a gathering space either—it’s mostly something that sits in the kitchen. Sometimes there’s a pretty tea set on it. Sometimes a bottle of multivitamins. That’s about it.
Real life happens on the floor.
So when I moved to the U.S. and bought a house with carpeted stairs—
especially while living with two to three cats at all times—
my brain simply couldn’t make peace with the idea.
At one point, I seriously considered tearing everything out and installing wood floors all the way through. People often think of me as an arts-and-crafts person, which is true, but I’m also a construction person. I’ve installed wood floors, drywall, and painted plenty of walls. This wasn’t fear.
What stopped me was curiosity.
What if I tried decoupage?
I was skeptical. Very skeptical.
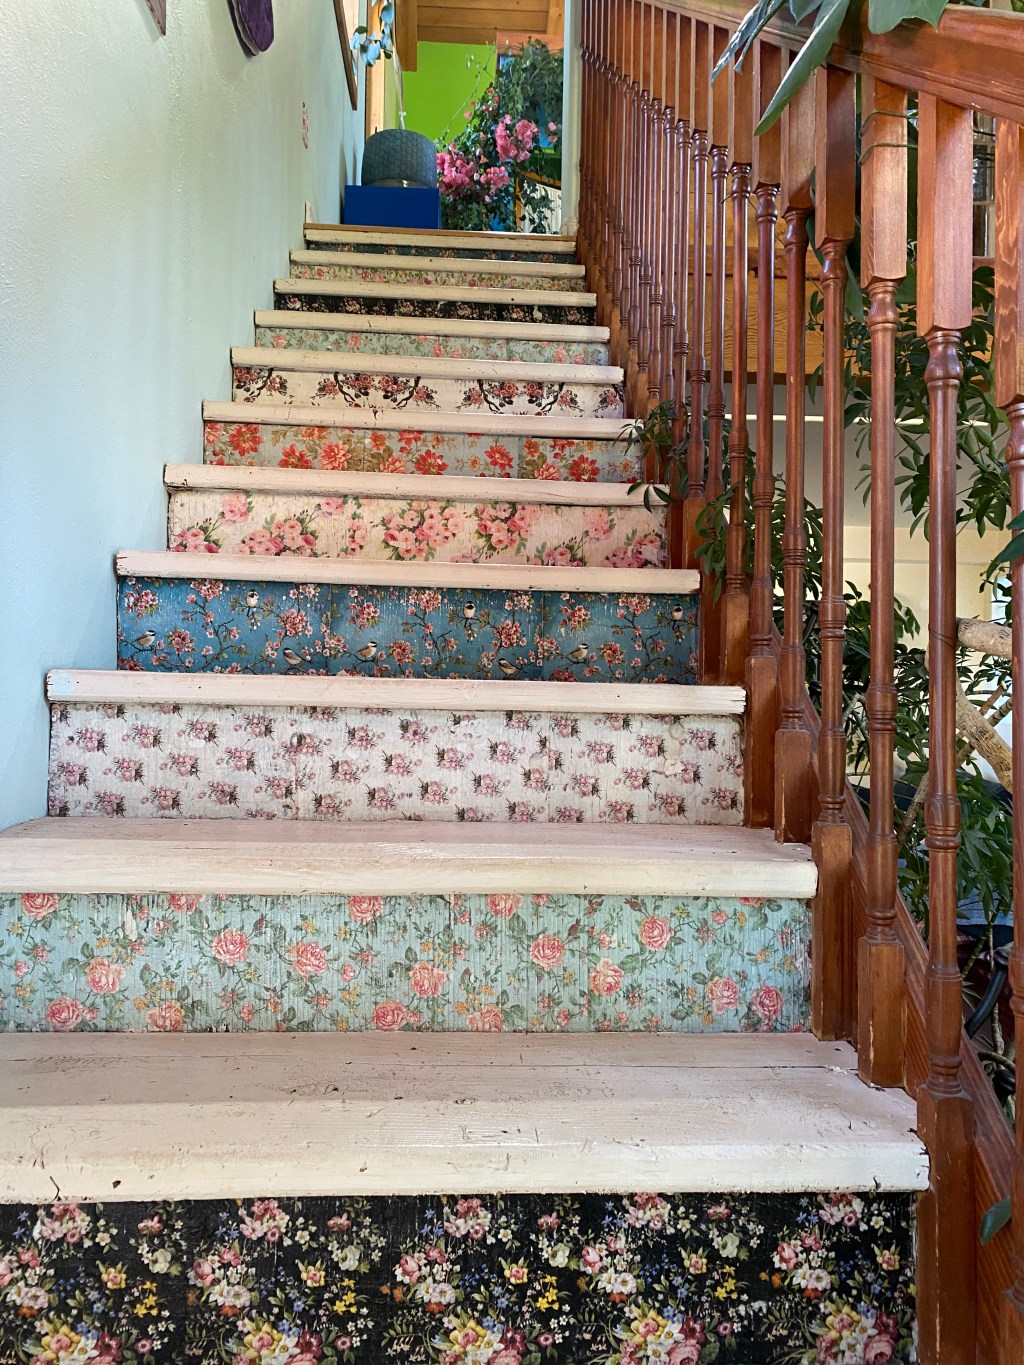
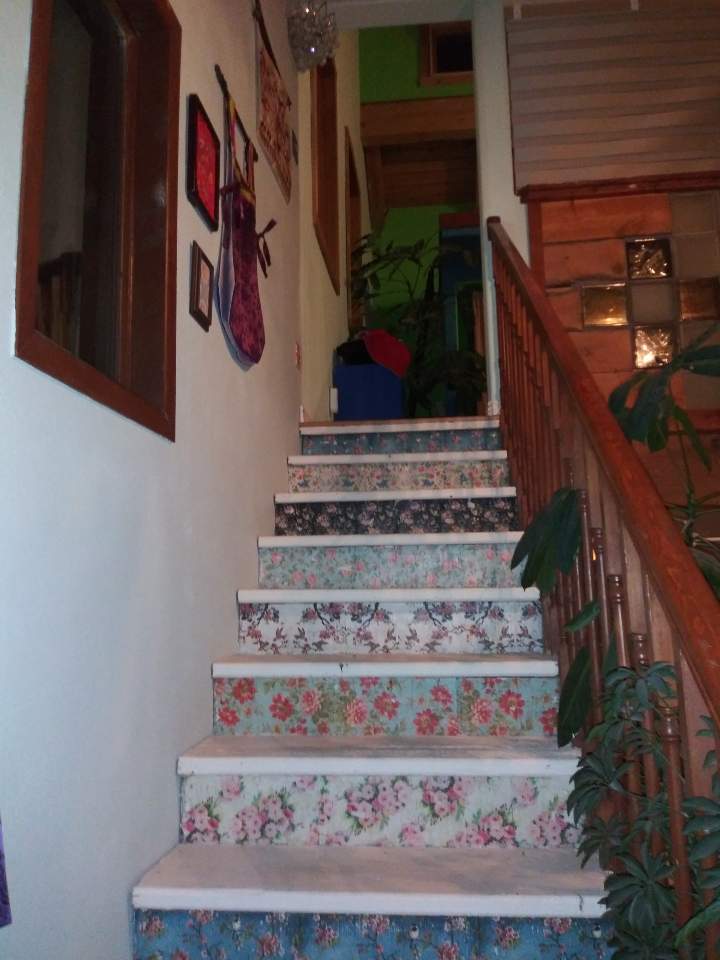
But this staircase was done for under $100, and it has held up for almost a decade. People still can’t get enough of it. People still ask how I did it. So here we are—not a step-by-step tutorial, but a story, with useful information tucked inside for anyone who wants it.
⛔️ A Gentle (But Important) Warning
Do not try this in a rental property.
Your DIY that you’re so proud of could be someone else’s disaster. Just admit it.
Also—if something goes wrong, no one really cares.
That’s the beauty of a $100 project.
Worst case? You wasted $100.
Best case? You live with it for ten years and forget it was ever carpet.
If this project causes relationship tension, remember this:
It cost $100. You’ll survive.
The LALA Way (Not a Tutorial)
This staircase was done entirely with napkins.
Napkins come in layers—usually three.
Two plain white layers underneath, and one printed layer on top.
You only use the top layer. Always.
Paint matters.
Use a light color. Dark colors absorb the print and make the design disappear.
I recommend something soft and vintage—beige, chalky, a little shabby chic. Chalk paint works especially well, and I’ll link the ones I use later.
Preparation matters too.
Clean the surface. Clean it again. Paint it.
Then block the area off for at least half a day so no pets or people wander across it in the dark and regret everything.
If you like a worn look, light sanding before decoupage helps.
But once you start, don’t scrape backward. Choose your color carefully.
Mod Podge does the rest.
Brushes don’t need to be precious. Use one for paint, one for glue.
If you forget to wash one and it dries solid, forgive yourself and throw it away.
For glue containers, don’t buy anything new.
An empty sour cream container works perfectly.
Please don’t rinse sticky paint down the drain or into a septic system—wipe it out and toss it instead.
You don’t need a top coat.
This staircase hasn’t had one for nearly ten years, and it’s still holding exactly as it did in the beginning.
Sometimes that’s enough — something that works, lasts, and quietly becomes part of your everyday life.
LALA all the way.

Leave a comment